Hard drive power draw at startup

The maximum power draw a PC with many hard drives happens at boot time, in my case, the PC is a n intel atom D525MW, which hardly draws any power

What this means is that I need an oversized power supply that only does its thing at startup, then becomes an inefficient power supply right after, why this is particularly important is because this computer runs on a UPS, and the number of minutes it can stay up is a very important number.

The solution is to enable PUIS (Power up in standby), what this does is allow the disks not to spin as soon as they get power, but instead, spin up upon reception of a command from the controller. so in effect, the disks are spun up sequentially (In turn).

Continue reading “Hard drive power draw at startup”

Mounting QCOW2 (KVM/QEMU) directly

First, the tools you need

apt-get install qemu-utils

Now, enable NBD

modprobe nbd max_part=8

Once that is enabled, connect the file as a block device

qemu-nbd --connect=/dev/nbd0 /hds/usb/virts/Windows/main.qcow2

Now, the block device should appear like any other, alongside the partitions inside !

fdisk -l

On my machine, this resulted in

Disk /dev/nbd0: 95 GiB, 102005473280 bytes, 199229440 sectors
Units: sectors of 1 * 512 = 512 bytes
Sector size (logical/physical): 512 bytes / 512 bytes
I/O size (minimum/optimal): 512 bytes / 512 bytes
Disklabel type: dos
Disk identifier: 0xc5324c42

Device      Boot     Start       End   Sectors  Size Id Type
/dev/nbd0p1 *         2048    104447    102400   50M  7 HPFS/NTFS/exFAT
/dev/nbd0p2         104448 198138958 198034511 94.4G  7 HPFS/NTFS/exFAT
/dev/nbd0p3      198139904 199225343   1085440  530M 27 Hidden NTFS WinRE

This disk was around 40GB, but fdisk will see the number corresponding to the largest allowed size, 100GB in this case ! let us mount the drive

mount /dev/nbd0p2 /hds/loop

Now, in this case in particular, like any other block device that held the windows operating system, more often than not, you will get the message saying

The disk contains an unclean file system (0, 0).
Metadata kept in Windows cache, refused to mount.
Falling back to read-only mount because the NTFS partition is in an
unsafe state. Please resume and shutdown Windows fully (no hibernation
or fast restarting.)
Could not mount read-write, trying read-only

The solution to that is simple, follow the following two steps to remedy the issue and then force mount the file by using remove_hiberfile

ntfsfix /dev/nbd0p2
mount -t ntfs-3g -o remove_hiberfile /dev/nbd0p2 /hds/loop

The result of NTFSFIX was

Mounting volume... The disk contains an unclean file system (0, 0).
Metadata kept in Windows cache, refused to mount.
FAILED
Attempting to correct errors...
Processing $MFT and $MFTMirr...
Reading $MFT... OK
Reading $MFTMirr... OK
Comparing $MFTMirr to $MFT... OK
Processing of $MFT and $MFTMirr completed successfully.
Setting required flags on partition... OK
Going to empty the journal ($LogFile)... OK
Checking the alternate boot sector... OK
NTFS volume version is 3.1.
NTFS partition /dev/nbd0p2 was processed successfully.

And the following mount command worked as you would expect, silently

Now, if you want to disconnect the NBD image, you need to unmount (Like you normally would) THEN

#Disconnect the image from the NBD device
qemu-nbd --disconnect /dev/nbd0;
#Unload the NBD module
rmmod nbd;

Linux badblocks cheat sheet

1- Large disks need to have their block size specified, without it, disks like my 6TB and my 8Tb hard drives will not work, badblocks will report the following error.

badblocks: Value too large for defined data type invalid end block (5860522584): must be 32-bit value

So the solution is to add the block size, like the following for example (This one is destructive)

badblocks -b 4096 -wsv /dev/sdb

It is a good idea to LOG THE BAD SECTORS (this is the command i usually use for a destructive test)

badblocks -b 4096 -o /root/badblockslog.txt -wsv /dev/sdb

In the command above, the W means do a destructive red-write test, the S is for show progress, and the V is for show the errors you encounter, the -o flowed by a file name is where to keep the log file

Updating the firmware on my 2TB Seagate Barracuda

Why update the firmware !

My answer here is a bit unconventional, and certainly not a fact.. I even think I am wrong, but it can’t hurt, so here it goes

Seagate recommends you update the disk’s firmware to improve performance and longevity of the hard drive, I on the other hand have an extra mission…

The firmware on a hard drive is stored partially on a chip on the PCB, and partially on the disk itself ! I know that disk platters have a data retention life of 10 years, the area where the firmware is written is never refreshed since it is read only when the disk boots up, So i am hoping (even though doubtful) that the firmware update might re-write this area of the disk and breath new life into it.

A disk certain application claims to refresh the data on that area of the disk, After testing that application I will come here and add my findings accordingly

Getting the firmware

Let us start by downloading the firmware ! To download firmware from seagate’s website, you will need to know your hard drive serial number, to do just that, open the command prompt elevated, and run the following command

wmic diskdrive get model,serialnumber

The result of me running that command is as follows

The results of executing the command above show that I have a hard drive of the model (ST2000DM001-1CH164) as you can see with a serial number that I now have (Masking serial numbers just in case seagate has a problem with me publishing them as it allows you to download the firmware using the serial number)…..

Now that I have the serial number, I can go to seagate’s firmware download page here and grab the firmware… once done, I unzip it, and the following folders appear

Creating a bootable USB flash disk

Now, inside the Bootable tools, there is a file (SeaChest_RC_2.7.4_10-18-2018.usbBootMaker.exe) that will create a bootable flash stick for you, insert a flash stick of any size that is to be deleted by this application, run the application, and now you have a bootable drive, but without the firmware, so copy the firmware folder you see above into the flash stick, and now you are ready to boot from it, for instructions how to boot from a flash stick, you will need to check with your motherboard’s manufacturer documentation, it is usually a simple thing such as hitting F11 at boot time.

Updating the firmware

Once booted, you should be presented with a linux command prompt, where we can run commands to update the firmware

To see what disks are on your system, run the following command

SeaChest_Firmware --scan

The scan should give you the handle for the drive, if you have never used linux before, the handle started with /dev/ (Short for device), and sata disks usually start with sdX (Where X starts with A and ends with a letter corresponding to the last disk you have in your system) old PATA disks usually start with hdX… but that is usually not something you need as PATA disks are virtually non existent at this stage

Now, execute the firmware update command like so

SeaChest_Firmware -d /dev/sg3 --downloadFW /firmware/filename.LOD

Now, if you want to know whether the update was successful or not, just run the scan command again, and note the firmware on it !

My Problem !

As you can see from the image below, I have 3 firmware files, named 1TB, 2TB, and 3TB, when i ran the command above, The system claimed that the update was successful, but didn’t really update the firmware, I was still stuck with 26 rather than 29 !

So i decided to use Seagates own configuration file to do the update with the command

SeaChest_Firmware -d /dev/sg3 --fwdlConfig GPCC2949.CFS

Surprise was that I got the following error

model matched but the current firmware version does not match the available updates

So, I went back in time and remembered that for this particular disk, I had changed the PCB before (Trying to get a 3TB disk to work by moving a certain chip from one board to the other, diagnosis turned out the problem is not the PCB)… So instead of flashing the 2TB firmware file, I flashed the 3TB, and what do you know, It worked.

Anyway, I will come back with screenshots of the whole thing… and more data for those who are having trouble updating their firmware, until then, hang in there

Mounting unclean NTFS windows drive in Linux

Whenever i get the following message

mount /dev/sdd1 /hds/sgt2tb
The disk contains an unclean file system (0, 0).
Metadata kept in Windows cache, refused to mount.
Falling back to read-only mount because the NTFS partition is in an
unsafe state. Please resume and shutdown Windows fully (no hibernation
or fast restarting.)
Could not mount read-write, trying read-only

The command

ntfsfix /dev/sdd1

resolves the issue, and produces the following message

Mounting volume... The disk contains an unclean file system (0, 0).
Metadata kept in Windows cache, refused to mount.
FAILED
Attempting to correct errors...
Processing $MFT and $MFTMirr...
Reading $MFT... OK
Reading $MFTMirr... OK
Comparing $MFTMirr to $MFT... OK
Processing of $MFT and $MFTMirr completed successfully.
Setting required flags on partition... OK
Going to empty the journal ($LogFile)... OK
Checking the alternate boot sector... OK
NTFS volume version is 3.1.
NTFS partition /dev/sdd1 was processed successfully

The same mount command you see here will now work flawlessly

mount /dev/sdd1 /hds/sgt2tb

I am still unsure what process from the mentioned above is responsible, as this oftentimes pops up on drives that were never system drives, so there is no hibernation file problem

Resume bad blocks where it was stopped

The answer to this should be simple, I initiated the test with

badblocks -nsv /dev/sdb

, first, interrupt bad blocks with ctrl+c, the output should be

Checking for bad blocks in non-destructive read-write mode
From block 0 to 1953514583
Checking for bad blocks (non-destructive read-write test)
Testing with random pattern:   0.92% done, 49:38 elapsed. (0/0/0 errors)
 21.32% done, 18:49:24 elapsed. (0/0/0 errors)

Interrupted at block 416437376

Interrupt caught, cleaning up

Okay, so we know what blocks it was supposed to check (1 through 1953514583), and where it was interrupted (416437376)

So i will ask it to resume testing from where it finished (-1), up to the end

badblocks -nsv /dev/sdb 1953514583 416437375

n = Non destructive
s = Show progress
v = tell us about what you find !

The new run should tell you the percentage correctly, but the time counter will be reset to zero, as it is only counting how long this run has been running for

One thing to note is that bad blocks can be used to instruct the filesystem to avoid the bad blocks, but it also allows the disk’s firmware to substitute bad blocks with spare blocks, so that the disk works again with no intervention from your end !

So for my 2TB hard drive…

416437375 = 21% (13 hours)
619014719 = 31.6% (+23:22)
627995199 = 32.15% (+1:04)
667782398 = 34.18% (+4:46)
715469885 = 36.62% (+5:44)
827834875 = 42.38%

While running the tests, you might want to keep an eye on the hard drive temperature with a command like

hddtemp /dev/sdb

To create a log file of the bad blocks, every run should have it’s own file !

badblocks -nsv -o /root/badblocks3.txt /dev/sdb 1953514583 627995198

The concatenation of those files you are creating is very useful in creating a file system if you ever decide to format the drive later !, but the recommended way is using badblocks with the other disk tools directly

while the test is running, you will see 3 numbers that correspond to readerror/writeerror/corruptionerror

BCACHE – how to setup

About this tutorial

Despite being lengthy, this tutorial is in fact easy and fast, I have split it to parts so that you can get down to business instantly if you need to.

Worth mentioning is that i think this simple procedure presents itself as rocket science, it is not, so advise you to dive in (experimenting on a separate computer first may be a good idea), again i assure you it is VERY STRAIGHT FORWARD, the length is because i am elaborating to make it easy.

Disclaimer

This is an effort to put all the information i need about bcache in one place for my referance and your benefit, but please beware, bcache should be run with backup (You will have to come up with things as raid will render the cache redundant for example and rsync for big files might make your CPU do a lot of work), in any case, i am not responsible and will not be held liable for any damage you may endure.

SSDs are the future

When it comes to SSDs, I would say they have come a long way in terms of price, and one day they will be replacing hard drives, I have no doubt about that, there is no advantage in a hard drive that an SSD can’t eventually match (You might argue that TBs written, maybe, but have you tried to check the reliability of a hard drive stressed to the level needed to achieve those TBs written ?).

What is bcache for

Spinning hard drives are fast beasts when it comes to sequential reads, but when it comes to random reads where the head has to go seek the data, they become very very slow, you can be reading at 200MB/s and suddenly drop to 2MB/s, While SSDs do not suffer this much from random reads, slower than sequential, yes, but nothing close to the gap you see in spinning disks, in a spinning disk, the speed difference can be 100 fold OR MORE.

History (Windows)

The earliest attempt that i can remember was Intel robson (2005), Intel robson or intel turbo memory was a feature in the Core 2 CPUs, but i don’t think it made it up to the Core I, it was not very popular and for a good reason, at the extra cost, OEMs could add more ram, not only would it be better for marketing, it also made more sense, as Windows was already introducing memory cache for disks with windows Vista.

Some time later, microsoft came up with Microsoft ReadyBoost (With windows Vista), readyboost relied on fast pen drives to cache the data from the spinning disk, it was not a very popular feature at the time for many reasons, the drawbacks is that they had to design it to be pulled out without affecting data integrity, making restrictions on the writing speed (Writethrough, can’t writeback), and still it was doing the stuff that RAM did perfectly. not to mention that affordable pen drives were not that fast to begin with.

Caching today.

As it is today, caching still makes sense, I would argue it makes more sense than ever, spinning hard disk drives are still much cheaper than SSDs, A good SSD, A 1 TB SSD from samsung is at around $340 for the EVO, and 460 for the pro (Jul 2017), compare that to the spinning disk, with a price tag averaging $40, and you will know that the difference is still around 10 fold, even more if you go up in size, So what do we do ?

The answer is cache the disk. now is a better time to use caching with super fast SSDs that employ wear leveling and are connected in a more stable and persistant connection (SATA inside the computer).

SSD caching On Windows.

On windows, the answer may be ISR (Intel Smart Responce), I have not tried it myself, but i have heard many good things about it, you get into your bios and set the disks are R.A.I.D, then use the Intel Management Engine software to cahce the spinning disk on the SSD, that simple.

I could almost swear INTEL had a software solution for this that was a bit pricy, but i can’t seem to find it, i remember watching a video about it many years ago.

In any case, I am not very experienced with windows, so I will just leave it here.

SSD disk caching on Linux

On Linux, there are many solutions, the one that i will be showing you how to use right now is bcache, because it is fast, efficient, and works on block devices.

So, I am assuming you have installed debian stretch (9), and you have logged in, and you have networking et al running, now, let us get to installing bcache, mind you, bcache has been part of the linux kernel since jessie or even before, so all you need is bcache-tools, in Jessie, you had to compile those with a few lines, in stretch, there is a package for it.

** BCACHE **

To help avoid the confusion, you can use your big hard disk before attaching an SSD, you can then, whenever you want, attach an SSD to it to start the performance gain.

Installing bcache tools in Debian Jessie (8)

** IF YOU ARE INSTALLING ON JESSIE, BCACHE TOOLS WERE NOT PACKAGED FOR JESSIE**

apt-get install git make gcc pkg-config uuid openssl util-linux uuid-dev libblkid-dev

git clone https://github.com/g2p/bcache-tools.git
cd /usr/src
cd bcache-tools
make
make install

** END OF FOR JESSIE **

Installing bcache tools in Debian Stretch (9)

apt-get install bcache-tools

Planning how to setup the drives

In this article, i will be setting up 2 separate disks that are not system disks, one is a 4TB spinning disk, the other is a 1TB SSD, there are a few rules that you need to be aware of though

1- You can cache as many backing devices as you wish with one SSD
2- You can not cache one backing device with more than one SSD

3- There are memory requirements for bcache, so for example dropping the disks in a 486 computer with 256mb ram and using iscsi is not a good idea .

My setup

The backing device is your large spinning disk, the caching device is the SSD

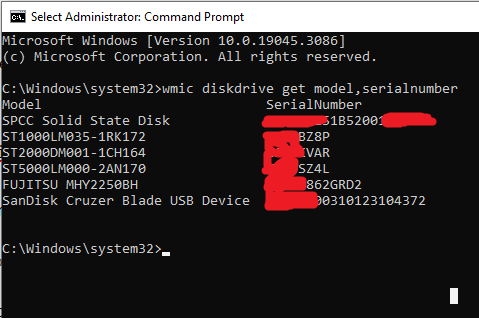
My backing device is a 4TB hard drive that is connected as /dev/sde
My caching device is a 1TB samsung 850evo (alignment considerations here since it is a tlc disk (the pro is MLC, works like a regular with no alignment issues)), connected as /dev/sdc

Setting up the backing device (sde), mounting and populating it with data

You may want to start with the following command to clear any existing filesystem from the drives (Change SDE with your own drive designation)

wipefs -a /dev/sde

Now, let’s format SDE as backing, and SDC as caching

1- Run parted for backing device

parted /dev/sde
mklabel gpt
mkpart primary ext4 0% 100%

2- Make it a bcache backing partition

Using make-bcache, you will use the -B switch to tell the system that this is the backing device, meaning the spinning disk

make-bcache -B /dev/sde1

output from the above will be something like

UUID:                   19d92bc8-8f49-479a-9480-33ca659b91b2
Set UUID:               0e3f386a-ec62-42b9-b0f3-025a09253946
version:                1
block_size:             1
data_offset:            16

3- Format it as ext4 or whatever filesystem you fancy

mkfs.ext4 /dev/bcache0

4- Mounting it like you would mount any other partition

mount /dev/bcache0 /hds/bcache0

5- If you like, you can now copy your data to it and get things ready before installing the caching device (before attaching the SSD as cache).

as i prefer to copy all the files to the spinning disk before attaching the SSD, since when we copy sequential, the SSD does not cache anyway, but the things it does cache are not the things we will use frequently, So i copy my files to it first, then i attach the SSD.

Setting up the caching device (sdc), then attaching it to the backing device

1- Create a partition on caching device (you chose the size you want to use as cache), but i would recommend that if you want to use the whole disk that you leave 10% unpartitioned for over-provisioning.

wipefs -a /dev/sdc

parted /dev/sdc
mklabel gpt
mkpart primary ext4 0% 90%

Using make-bcache, you will use the -C switch to tell the system that this is the caching device, meaning the solid state disk (SSD)

make-bcache -C /dev/sdc1

output from the above will be something like

UUID: eeda3570-eb1b-4983-8c53-76322a654585
Set UUID: 92dbf6ca-0f0b-44d5-b70e-8f1e7919838d
version: 0
nbuckets: 1716964
block_size: 1
bucket_size: 1024
nr_in_set: 1
nr_this_dev: 0
first_bucket: 1

Now, even if this is not for a technical purpose, just to give you the feel of this, try running the command below, the command should result in “no cache” because we did not attach a cache to it yet

cat /sys/block/bcache0/bcache/state

DO NOT Format the caching partition as ext4

this time, we won’t be formatting it in ext4 like the backing device above (think about it, the OS should see the backing device, and at some abstraction layer not even know about this one, so why would it have a file system other than the one that bcache itself understands), we will simply be attaching it to the disk.

Attaching the caching device

If you take a look at the result from make-bcache -C command, you will notice a Set UUID, we will need this unique ID to tell bcache what SSD to connect to what cache, the only cache we have so far is bcache0 as you can see from above, here is how we attach it.

echo 92dbf6ca-0f0b-44d5-b70e-8f1e7919838d > /sys/block/bcache0/bcache/attach

Now, if we run the command above again

cat /sys/block/bcache0/bcache/state

It should read “Clean” or “Dirty” instead of “no cache” (I would bet it reads clean at this stage), Depending on whether something has been written to it and still not in the backing device, or clean otherwise.

Setup all done, unless you want to fine tune it for your purpose, then read on.

Tuning the cache.

1- Caching mode

to inspect what caching mode we are using now

cat /sys/block/bcache0/bcache/cache_mode

Which will probably result in

[writethrough] writeback writearound none

By default, the system uses writethrough (better data integrity), but if you are like me, and have made 100% sure the electric won’t ever go down, or if you backup the data in real time, you might want to switch to writeback, writeback gives much faster write operations which is not necessarily a requierment for all applications.

echo writeback > /sys/block/bcache0/bcache/cache_mode

2- sequential read cutoff

The other thing you might wish to tune is the size of the sequential read/write cutoff, we want a size short enough to be worth caching, by default, it is 4MB, so that everything under 4MB sequential will be cached, I personally like to take that down to 1MB judging by the fact that files larger than 1MB do read pretty fast directly from the disk ! but surely, this will depend on your application and on experimentation with your application.

cache 1 megabyte and smaller

echo 1M > /sys/block/bcache0/bcache/sequential_cutoff

cache everything (special value, not the same mathematical logic of less than)

echo 0 > /sys/block/bcache0/bcache/sequential_cutoff

back to caching 4 mega bytes and smaller (default)

echo 4M > /sys/block/bcache0/bcache/sequential_cutoff

3- Percentage of dirty data to allow on SSD.

I personally like it the way it is (10% of the SSD’s size), but you can change that, and sometimes you have to temporarily change that for certain purposes)

Flush all dirty data to disk as soon as you can

echo 0 > /sys/block/bcache0/bcache/writeback_percent

Allow 10% dirty data

echo 10 > /sys/block/bcache0/bcache/writeback_percent

the first (Value 0) is very usefull when you want to disconnect the cache, to disconnect you want the dirty_data to be 0 on the SSD, so you can start by issuing the first line above, then as soon as all the data is flushed to the backing device, you can disconnect the SSD like i will be showing you further down.

Manipulating the setup

Sometimes, you want to change your SSD with a larger or smaller or newer one, other times, you want to disconnect it and use the backing device without a cahce, other times, you want to use the same caching device to cache more disks, here i will show you how

Assuming you want to disconnect the SSD, for this to happen, you will need to go through a couple of steps, first, make sure there is no dirty data, and second, detach it from the backing device

For the first step, we should inform bcache that we don’t want any dirty data, by default, bcache allows for 10% of the size of the SSD to be dirty data, we need to make that ZERO percent

echo 0 > /sys/block/bcache0/bcache/writeback_percent

remember, if you reattach or otherwise, you should set it back to ten percent in the same way

echo 10 > /sys/block/bcache0/bcache/writeback_percent

Monitoring cache and cache performance

1- How much dirty data is on the SSD, Assuming that “/sys/block/bcache0/bcache/state” reads dirty, you can see how much data is dirty with the command.

cat /sys/block/bcache0/bcache/dirty_data

2- Caching statistics

tail /sys/block/bcache0/bcache/stats_total/*

Force mount hibernated NTFS volume

This problem is one i face often, because of how older versions functioned, the answers online no longer apply, online, you will find that

ntfsfix /dev/sdc2

should do the trick, in reality, it will not as you will see the following error

Mounting volume... OK
Processing of $MFT and $MFTMirr completed successfully.
Checking the alternate boot sector... OK
NTFS volume version is 3.1.
NTFS partition /dev/sdc1 was processed successfully.

The solution in reality is asking ntfs-3g’s mount to remove the hiberfile

WHAT YOU NEED – YOU WILL LOSE THE HIBERFILE

mount -t ntfs-3g -o remove_hiberfile /dev/sdc2 /hds/intelssd

Without the remove_hiberfile instruction, you will probably get an error message such as

Windows is hibernated, refused to mount.
Failed to mount '/dev/sdc2': Operation not permitted
The NTFS partition is in an unsafe state. Please resume and shutdown
Windows fully (no hibernation or fast restarting), or mount the volume
read-only with the 'ro' mount option.

Where you can actually mount it as read only if you do not want to write to it with the line

 mount -o ro /dev/sdc1 /hds/intelssd

Mounting a multipart vmdk disk on Linux

There are many ways to do that, one of which is using the tools provided by vmware to combine the disks into one and then mounting it with

kpartx -av mydisk.vmdk;

Then

mount -o /dev/mapper/loop0p1 /hds/disk

While another method, which is simpler

apt-get install qemu-utils
qemu-img convert disk-s001.vmdk s01.raw
....
qemu-img convert disk-s013.vmdk s13.raw
....
qemu-img convert disk-s032.vmdk s32.raw

The above will be sparse files, so you will not have disk usage as big as the file, a “df -h” should not result in any lost of disk space beyond the data that is used by files in the image

following the above, we need to combine the RAW files like so

cat s01.raw s02.raw s03.raw s04.raw s05.raw s06.raw s07.raw s08.raw s09.raw s10.raw s11.raw s12.raw s13.raw s14.raw s15.raw s16.raw s17.raw s18.raw s19.raw s20.raw s21.raw s22.raw s23.raw s24.raw s25.raw s26.raw s27.raw s28.raw s29.raw s30.raw s31.raw s32.raw > combined.raw
losetup /dev/loop0 combined.raw
kpartx -a /dev/loop0
mount /dev/mapper/loop0p1 /hds/img1

Recovering deleted files from ext4 partition

Update, although extundelete restrored most of my files, some files could only be restored with no file name through an application that is installed with testdisk called photorec

So, what happened was that i added a directory to eclipse, a message appears, i hit enter accidentally, all the files in the web directory are lost, no backup, years of programming…

Instantly, i shut down the computer so that i do not overwrite the disk space with new files and logs and the like, i got a larger disk (1.5tb) and did the DD first (i recommend gddrescue in place of DD just in case your disk has bad sectors).

Installed Linux (Debian 7) on the new disk, installed the hard drive from the other computer to the new PC, then installed the software i always use to recover files, testdisk, test disk did not work as expected, on both disks, when it comes to the ext4 partition, the process that ended in an error would be as follows

testdisk
create log file
Chose the 1TB disk (the one with the deleted files
Partition type (INTEL)
Advanced
Chose the main partition *(ext4) and chose List (left and right arrow keys)
Damn, the error.

TestDisk 6.13, Data Recovery Utility, November 2011
Christophe GRENIER <grenier@cgsecurity.org>
http://www.cgsecurity.org
 1 * Linux                    0  32 33 119515  60 33 1920010240
Can't open filesystem. Filesystem seems damaged.

So, i quit TestDisk and installed
apt-get install extundelete

extundelete /dev/sdb1 --restore-directory /var/www

This way, i only restore the files from that direcotry, if you want all the deleted files, you could surely use something like

extundelete /dev/sda4 --restore-all

Anyway, my files are back, a few are missing, but i am sure i can deal with that